User Guide
Step 1 - Plug in your Detector
Use the supplied Ethernet cable to connect your detector to the internet, simply plug the cable into the detector and an open port in your router. If your network equipment supplies Power-over-Ethernet (PoE), you can move on to step 2 now; if not, you will also need to plug in the supplied USB cable to the detector as well as any USB port available or the supplied USB wall-adapter (US wall outlet).
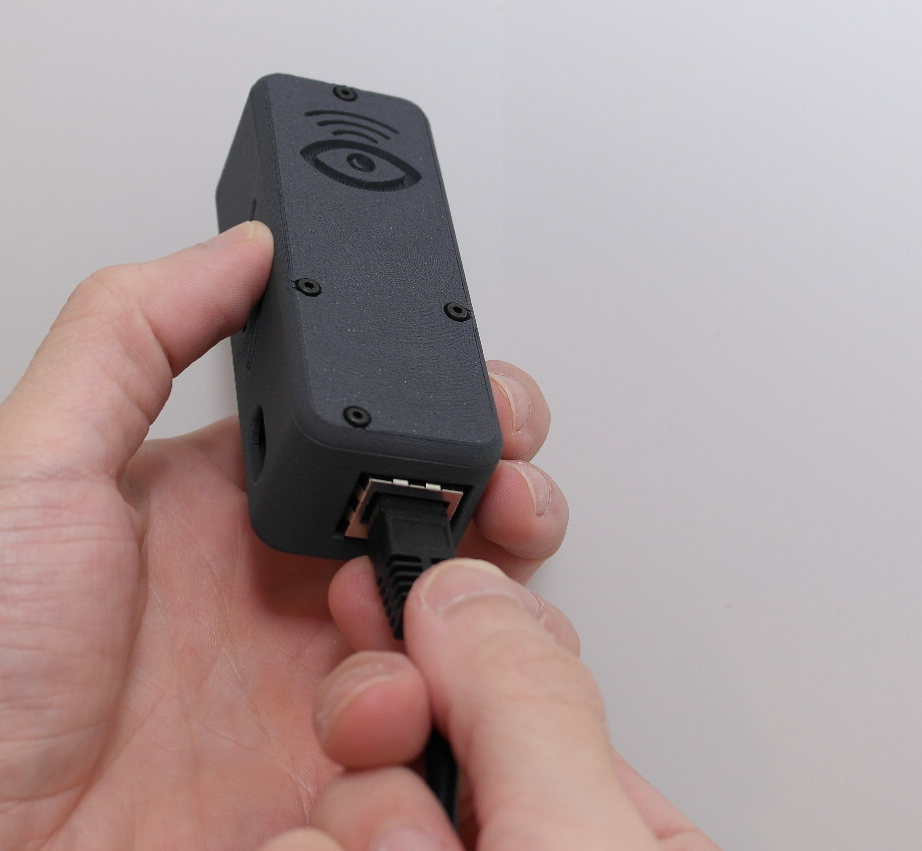
If you are using POE, proceed to step 2 now, otherwise, plug in the USB cable as shown in the next image.
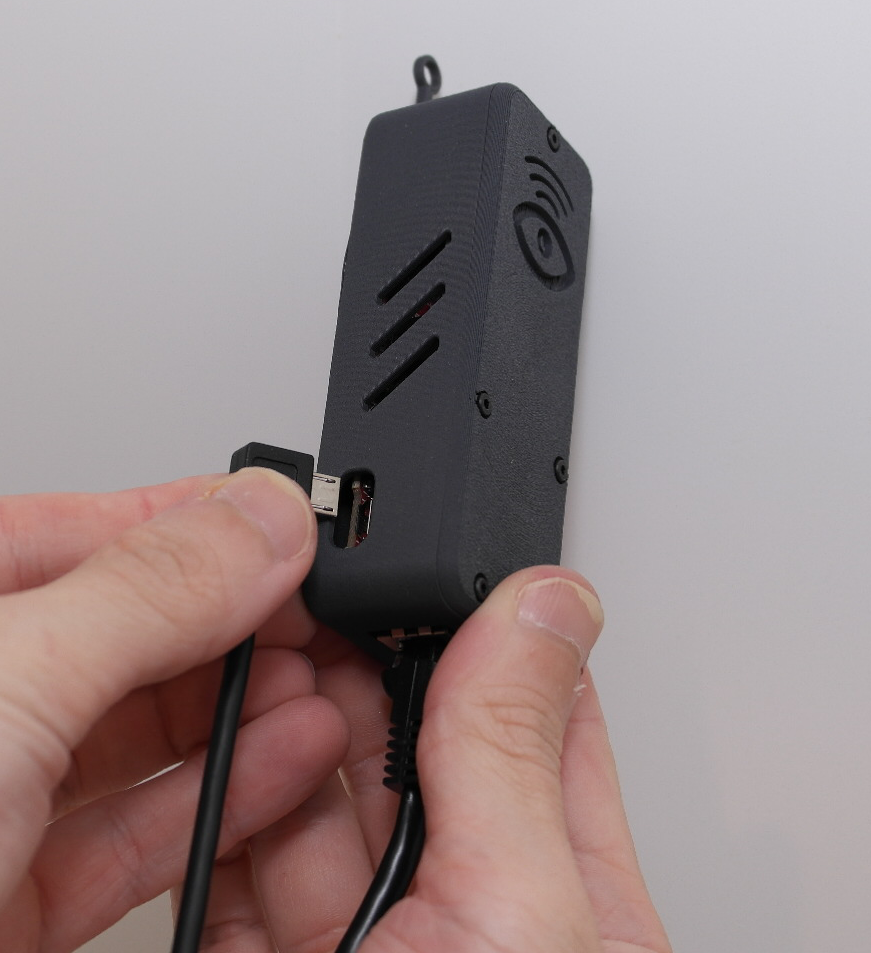
Do not use the USB cable if you are using Power-over-Ethernet!
You should mount the device on the wall for best performance (but is not 100% necessary); try to keep at least a few feet away from other electronics. The detector works based on proximity to the jammer, so a central location is best to cover your entire home.
Installation Tips:
Make sure the Ethernet connection is hard-wired all the way out to your ISP, meaning, do not plug the device into a wireless mesh-node.
It’s best to wall mount the detector around 5ft high, but this is not required.
Make sure to keep the detector at least 1ft away from other radio electronics (like your wireless router).
You should place the detector in a central location around your home/area you want to protect.
Microwave ovens can trigger false alerts if the detector is too close to the microwave (a couple feet).
Step 2 - Install the App
Download the mobile App from the App/Play Store, you can install the App on your smartphone or tablet. Once installed, you must allow push-notification permissions and Bluetooth permissions so you can pair the device and receive alerts. Then, enter your email address to receive a one-time-code to login. This email will be your account and notifications will also be sent to your email incase the push-notifications do not come through for extra security.
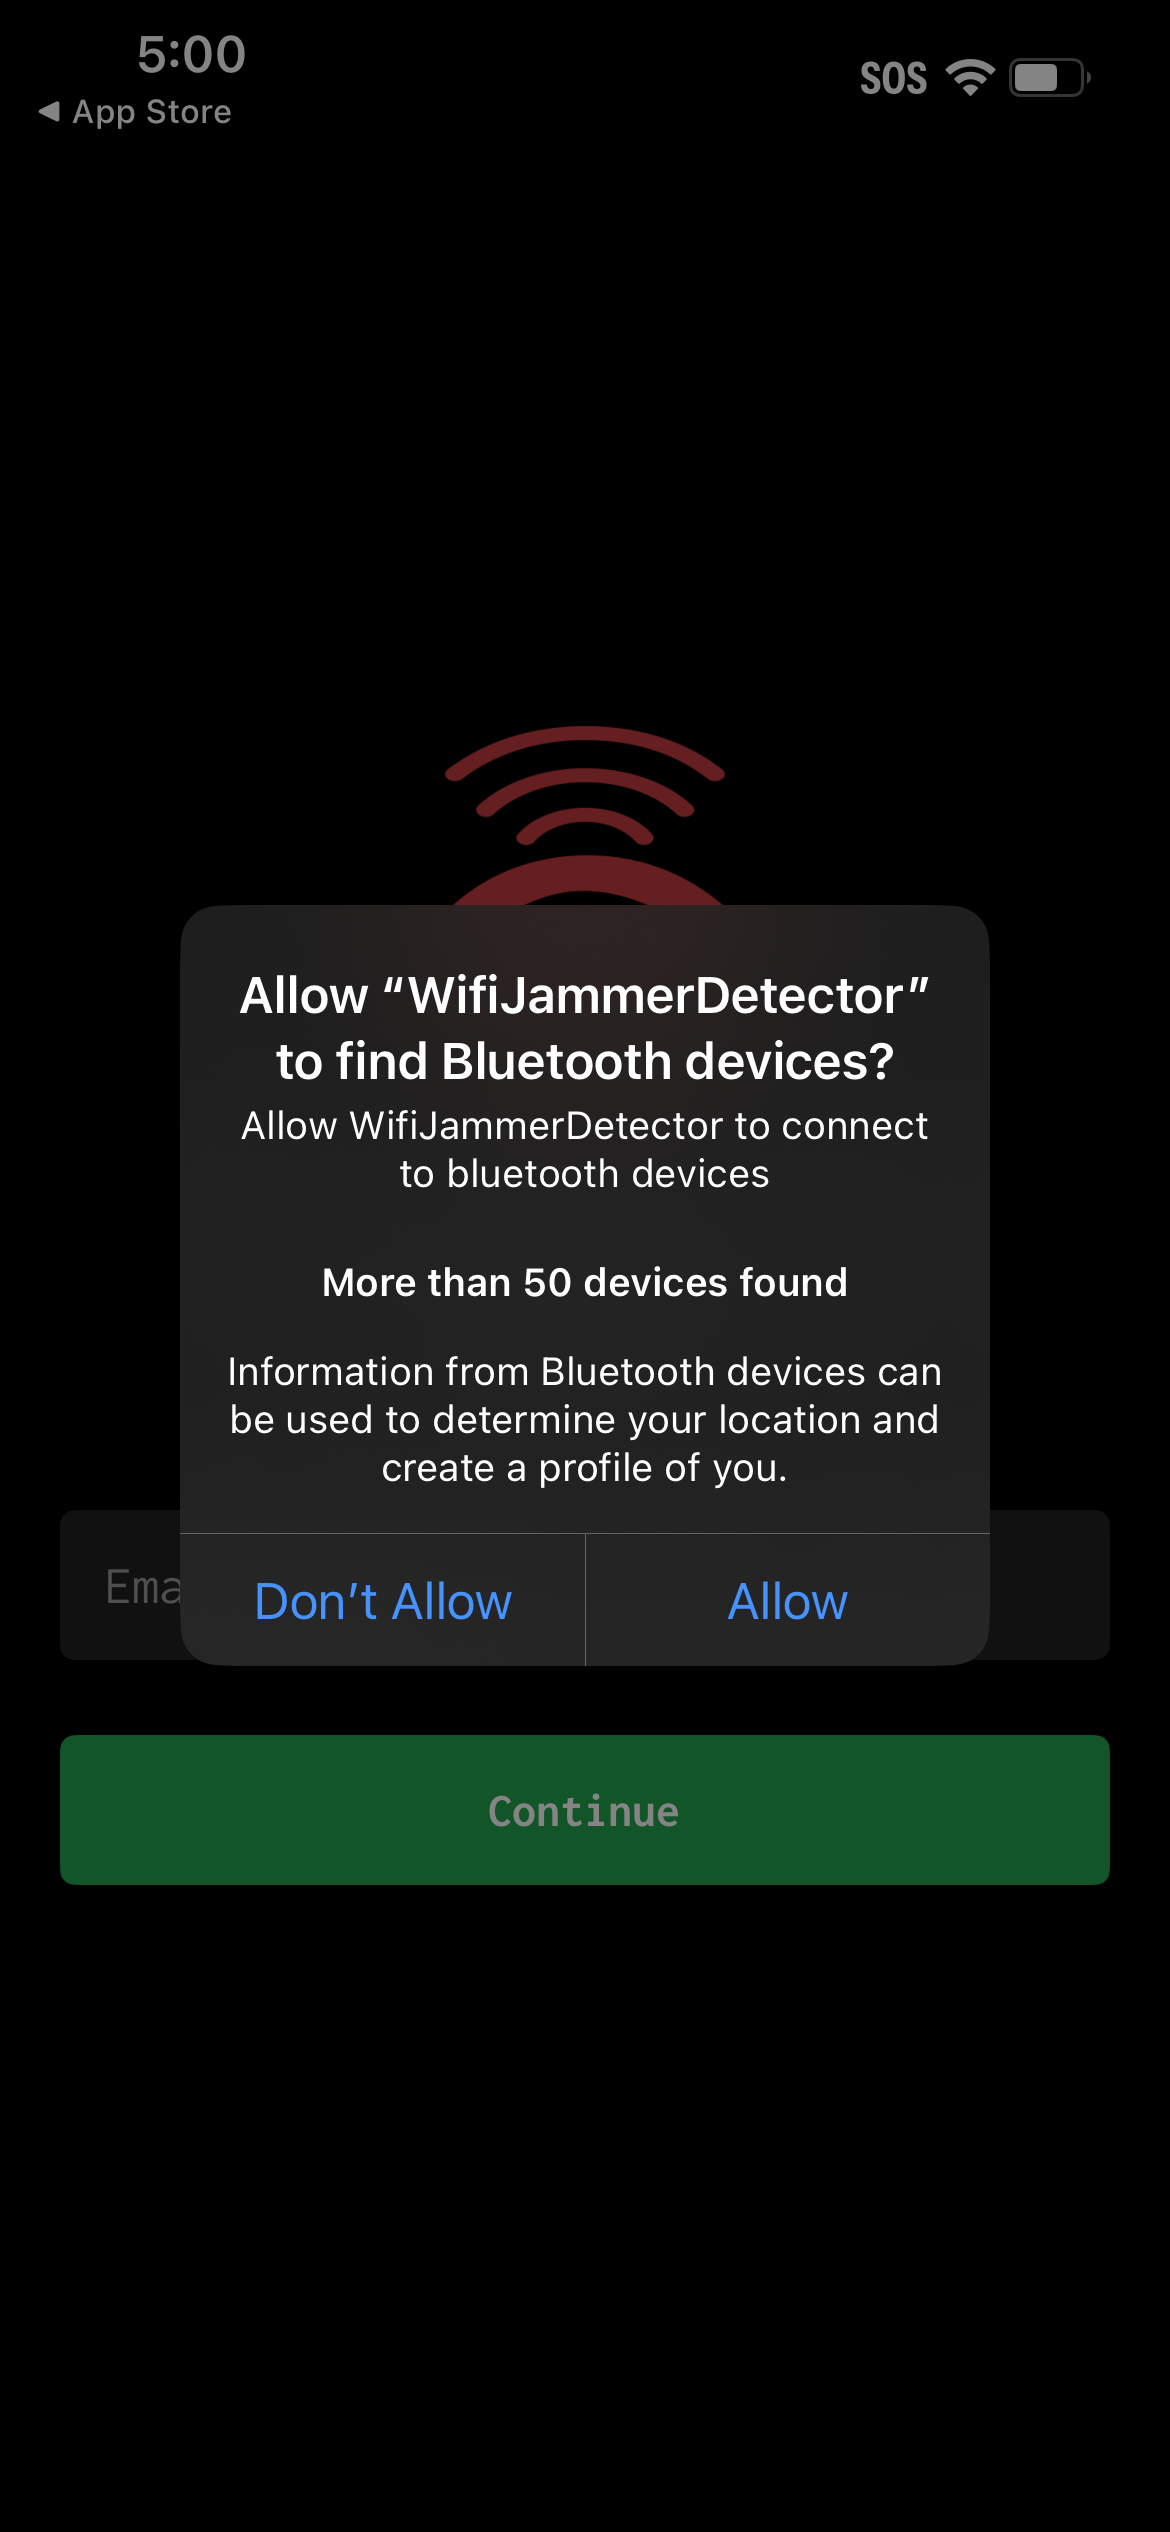
You must Allow Bluetooth permissions to add your detector to your account.
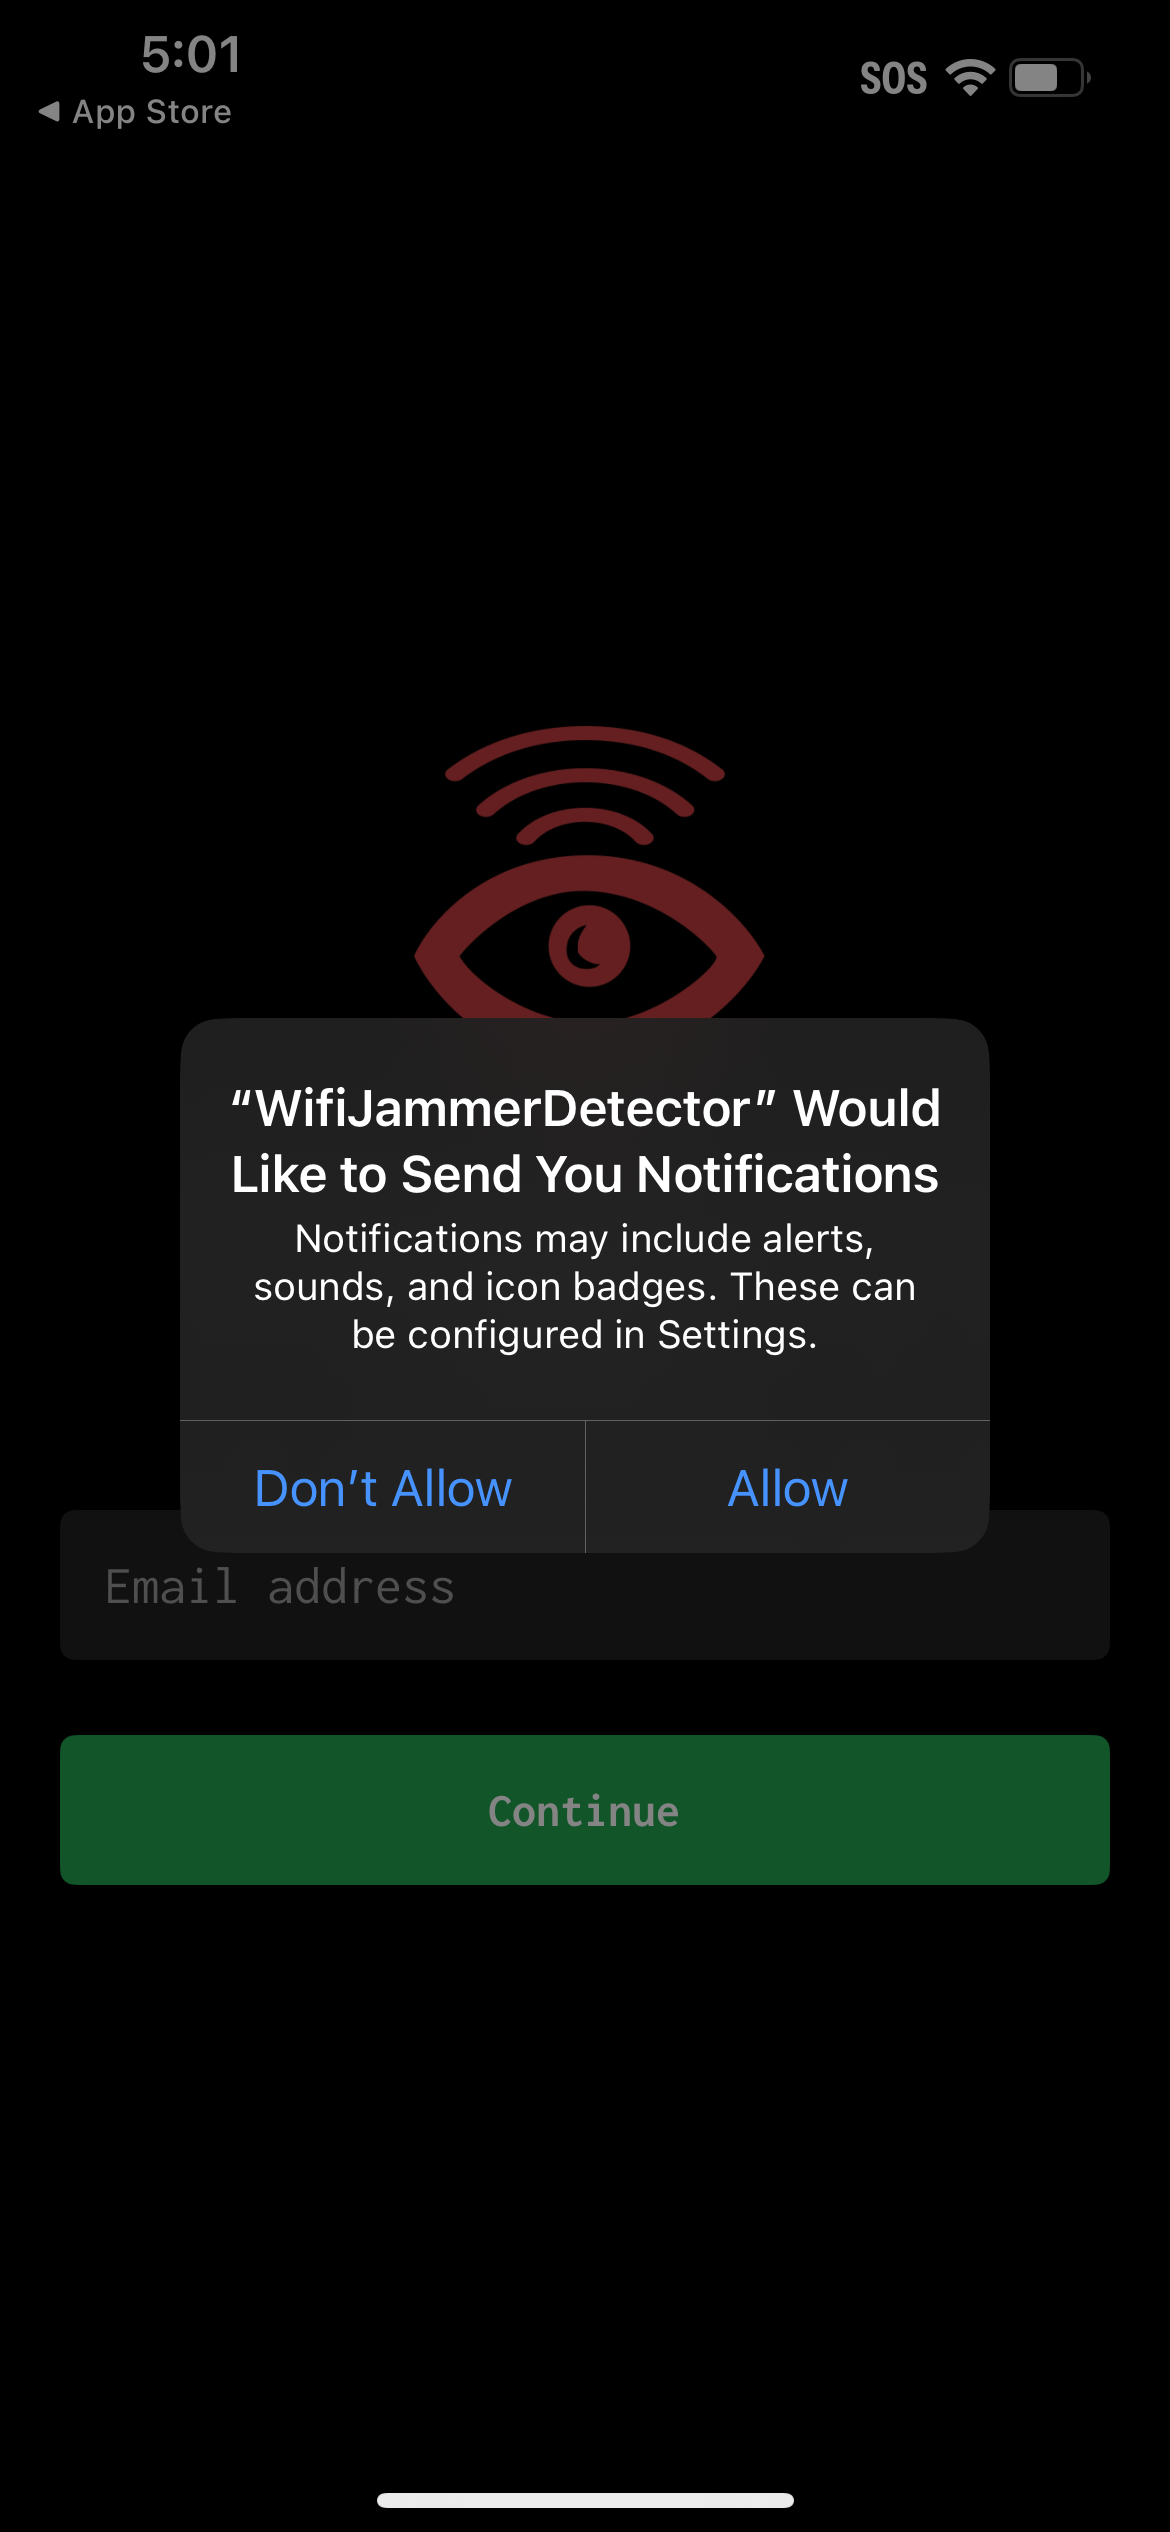
You must Allow Notification permissions to use the App, we will only send you notifications (and emails) for the following events:
Detector fell Offline
Detector detected Wi-Fi Jamming
Detector came back Online

Enter the Email address you wish to receive notifications at, this will be your account email once you confirm the next step.
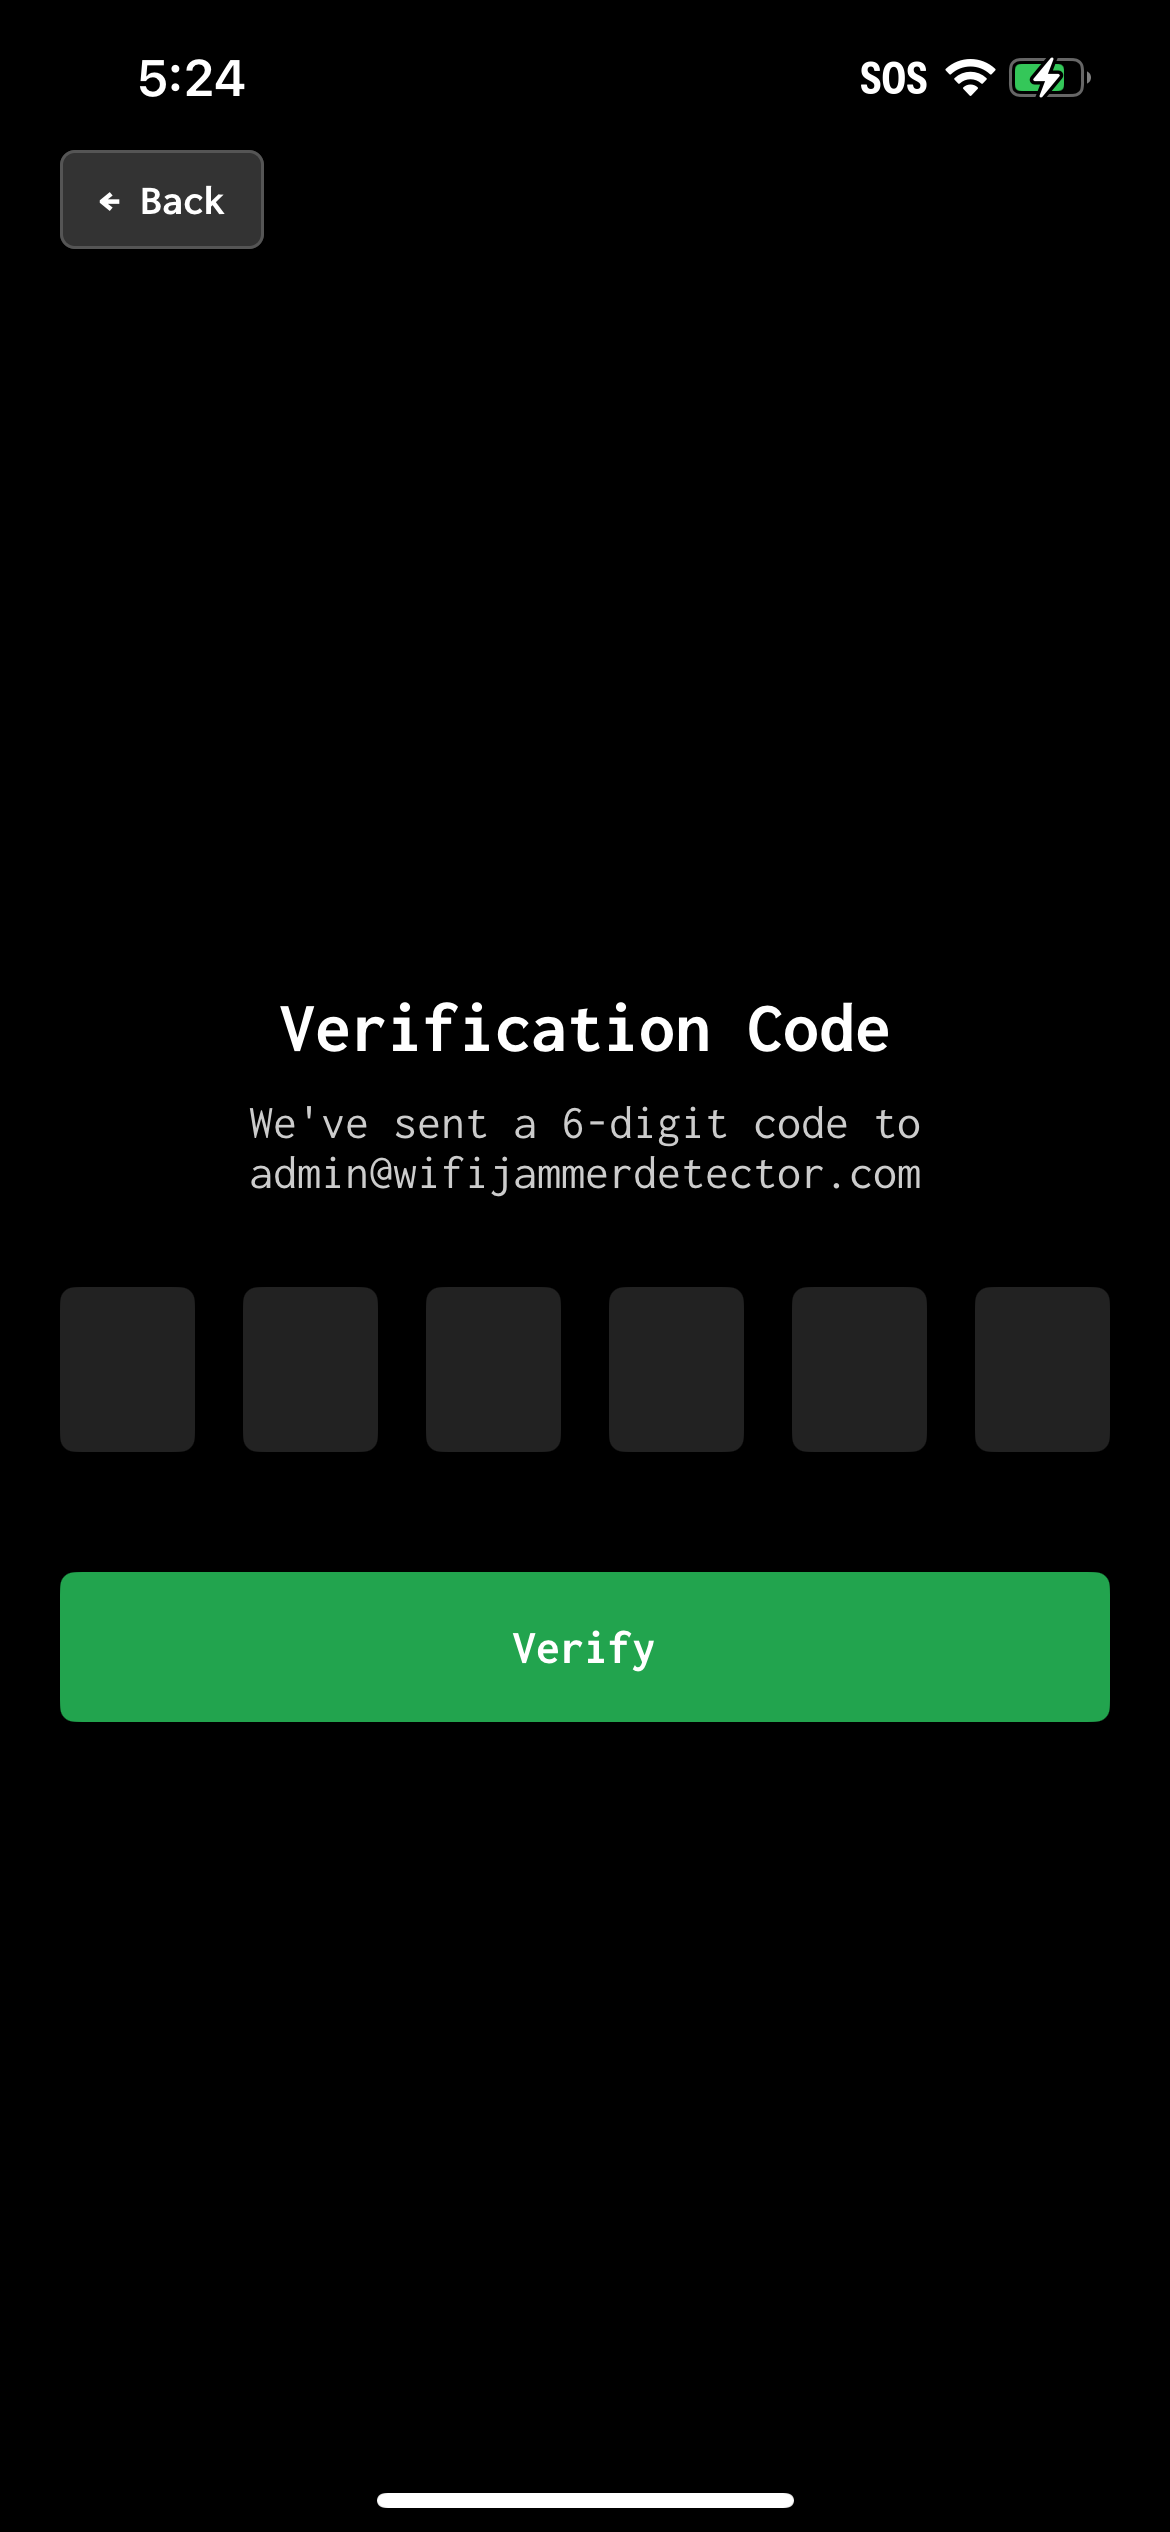
You should have received a 6 digit code, confirm ownership of your email with this code (check your spam folder if you did not receive it).
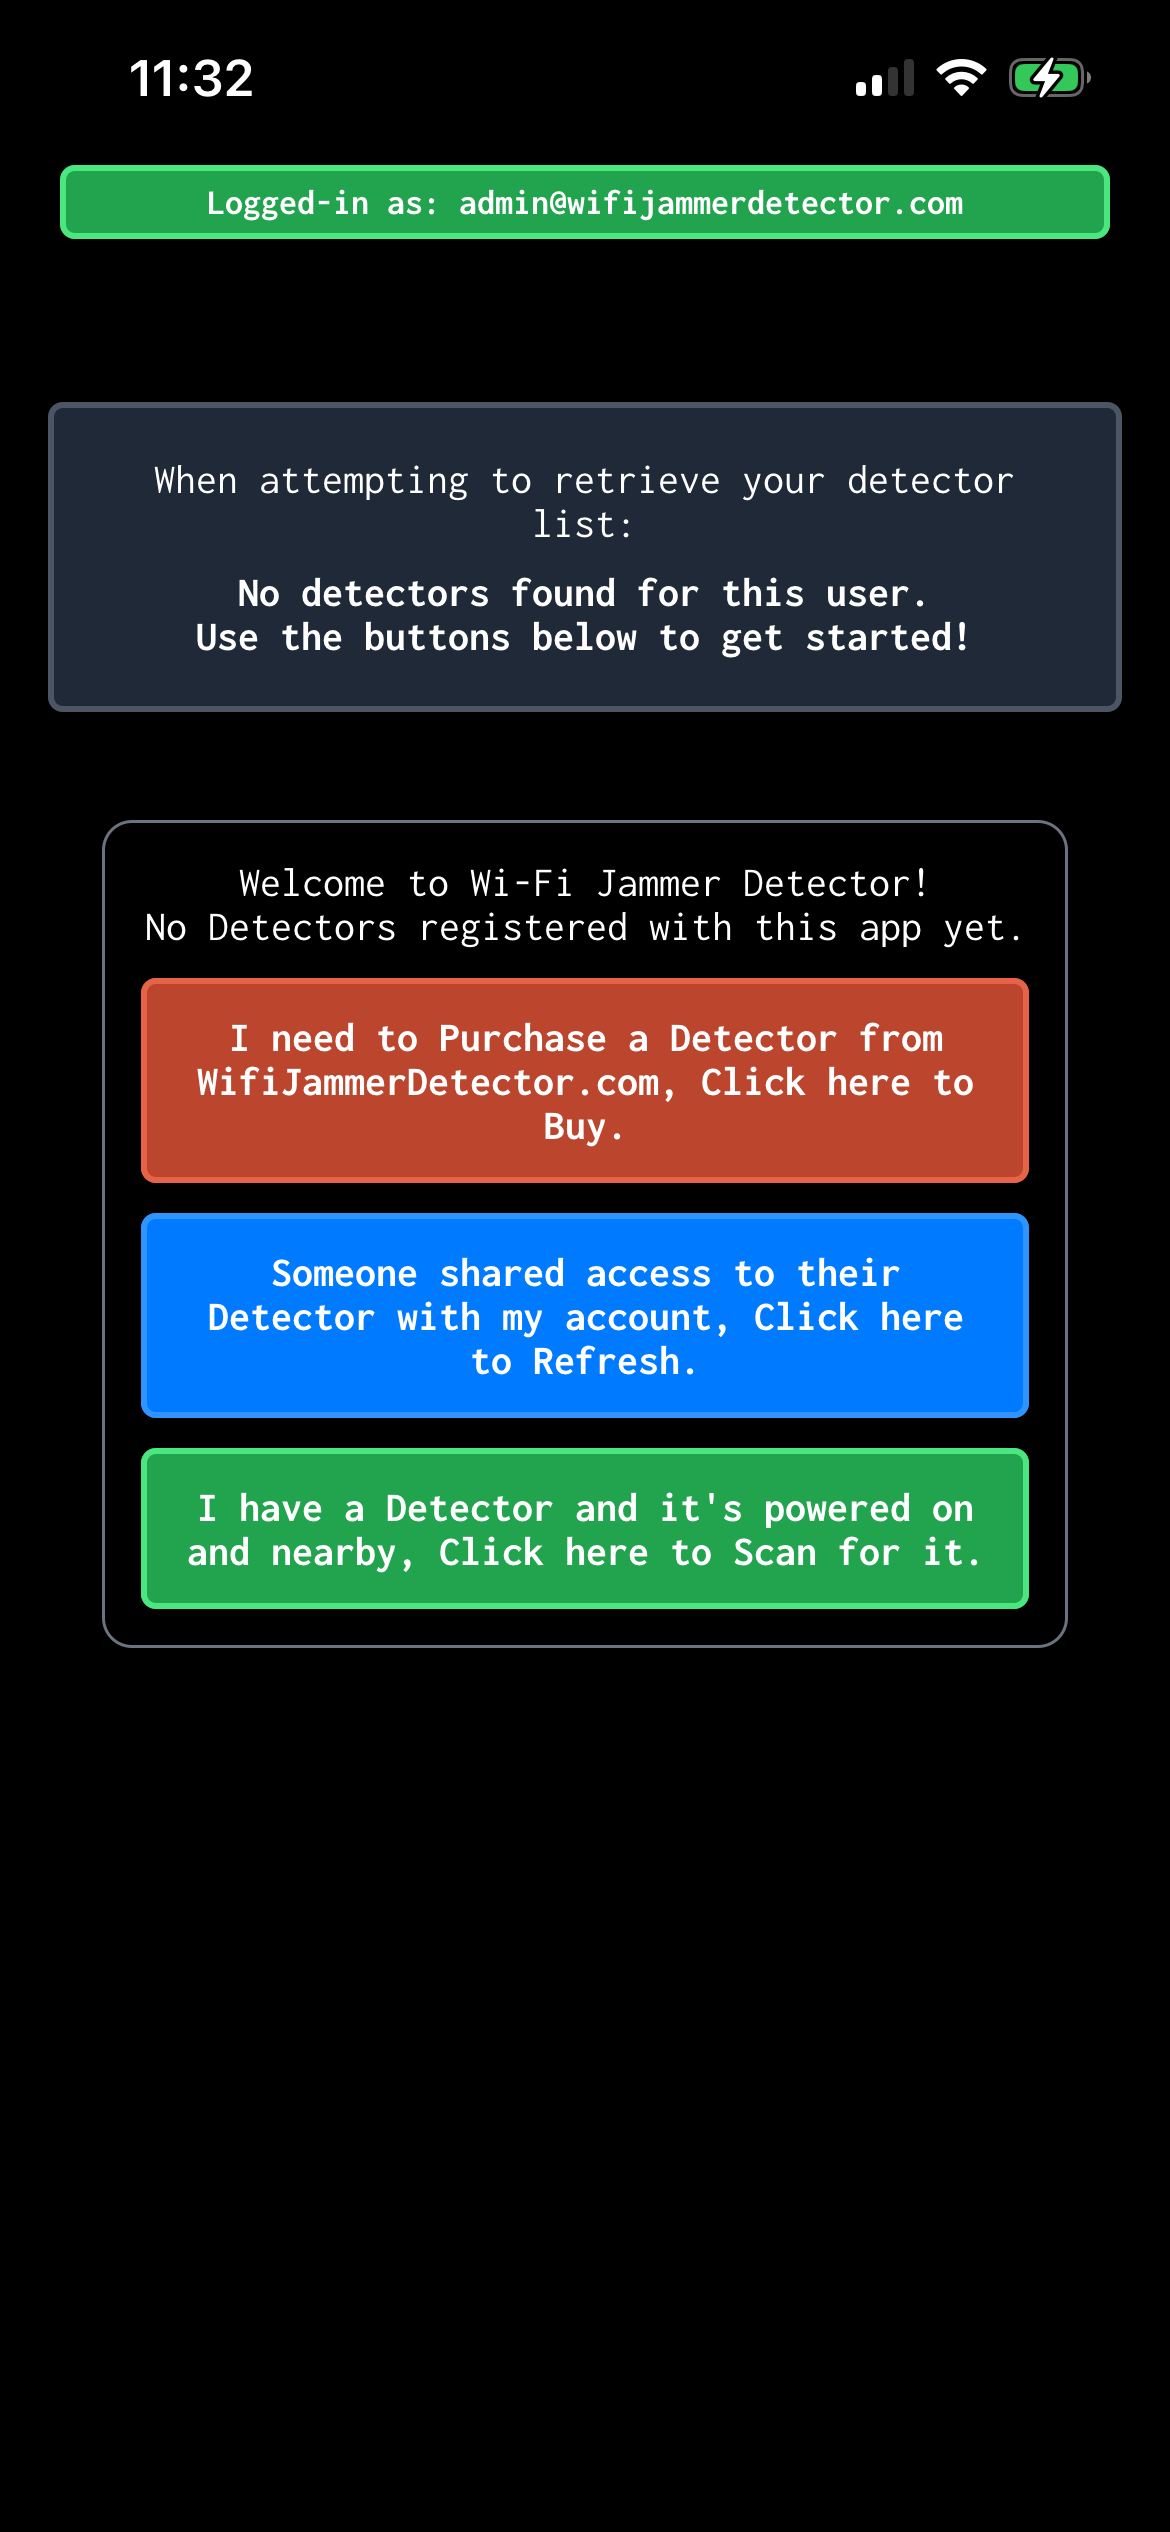
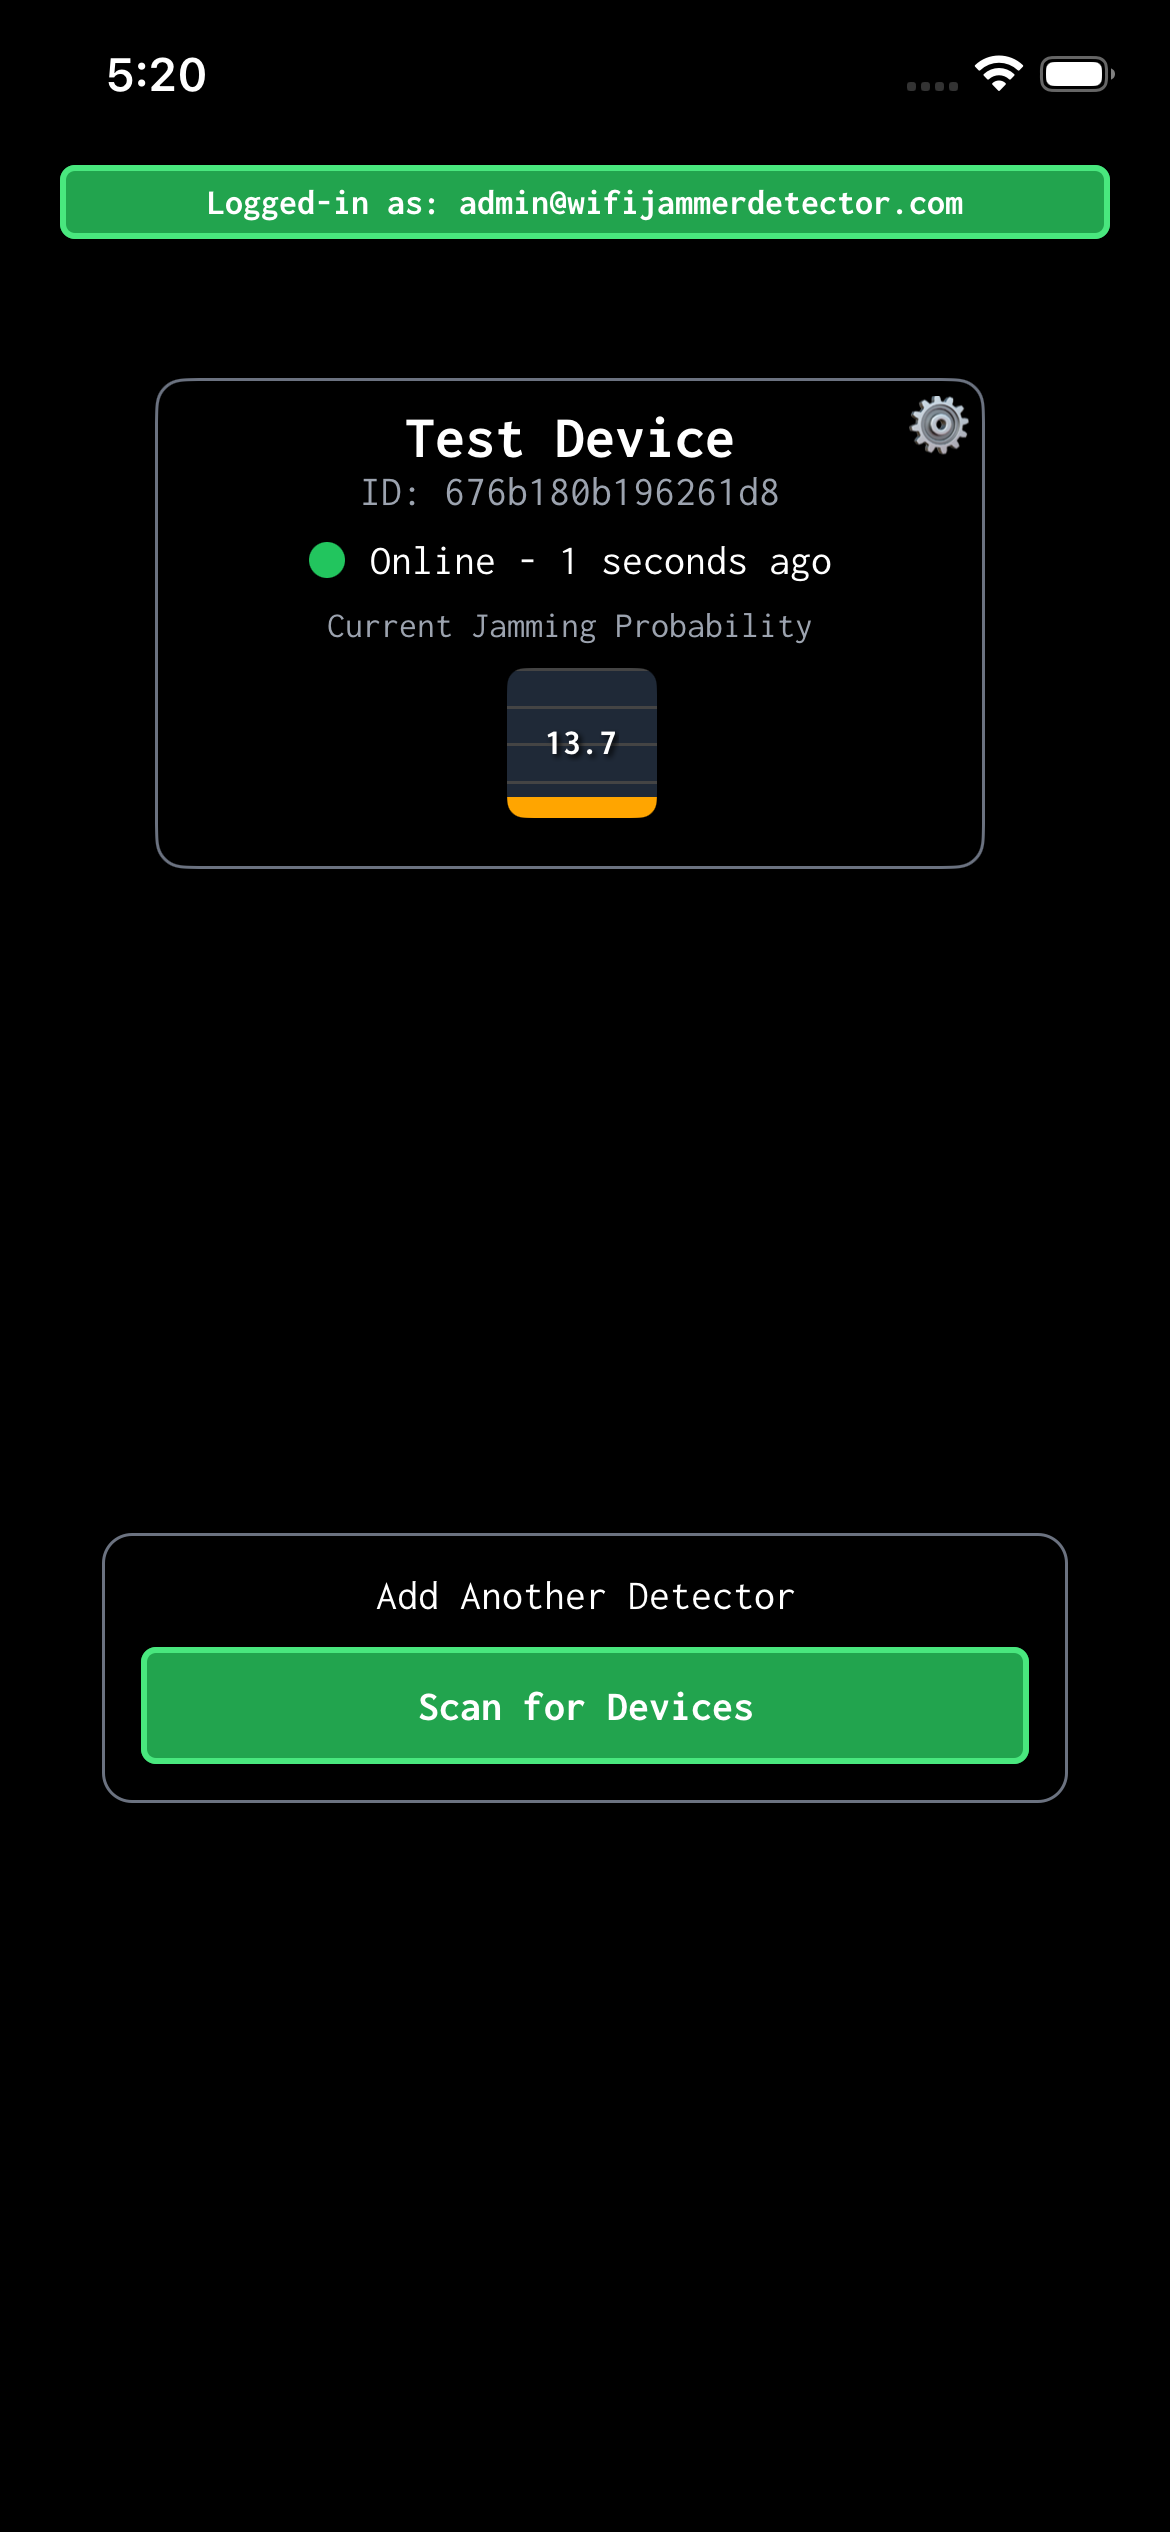
Once logged in, you will see a few buttons, click the last one (green) to scan for your nearby and powered-on device.
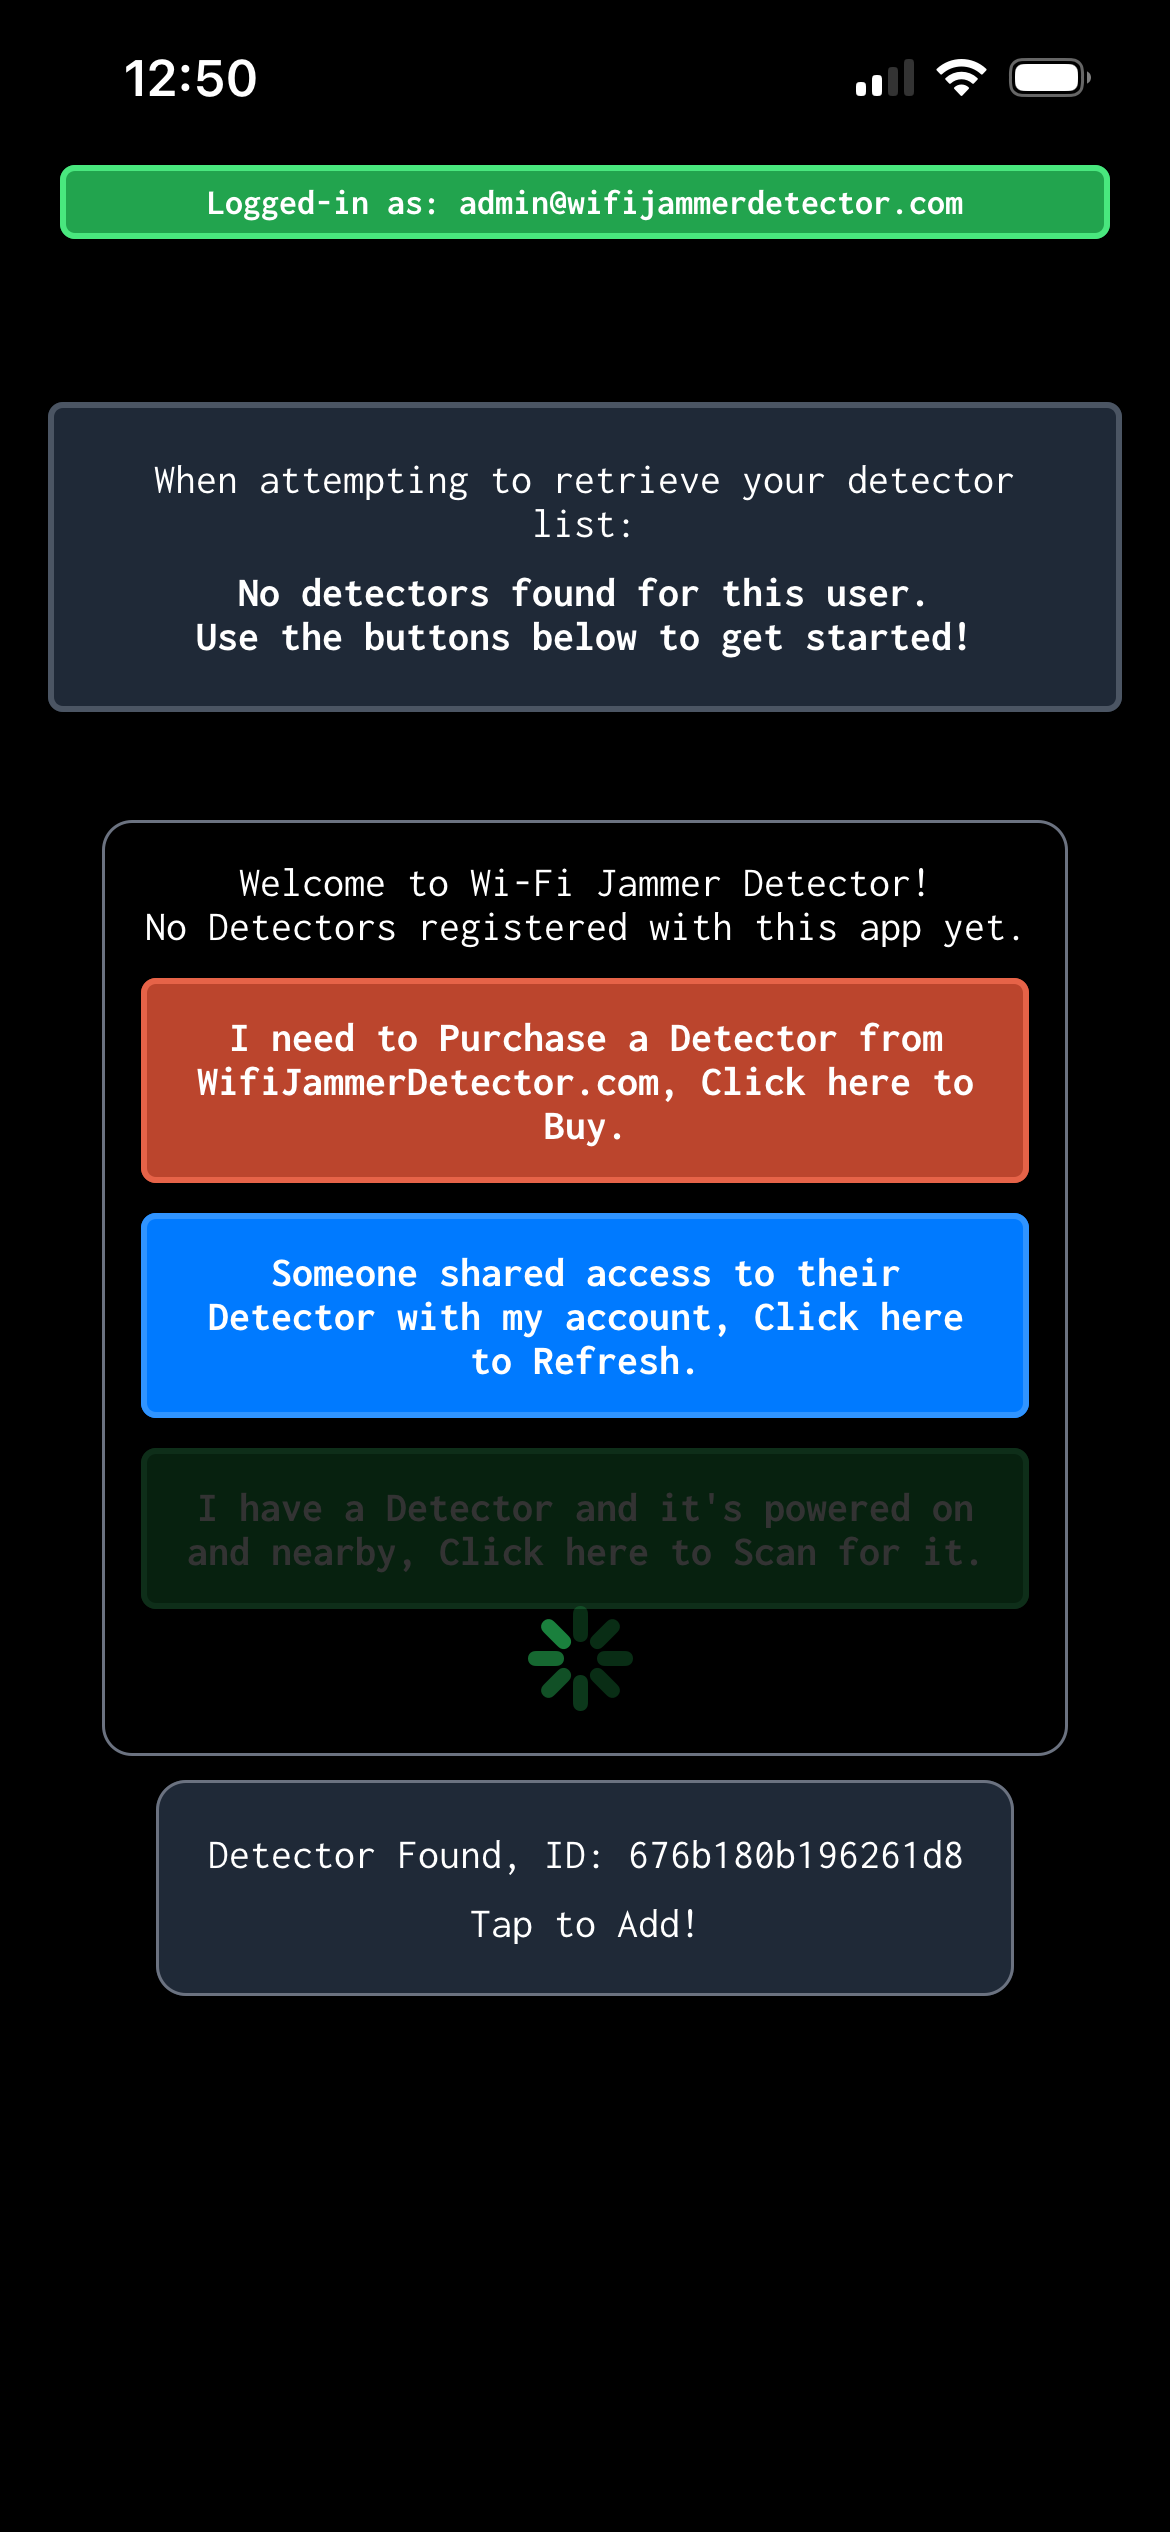
You will see the device show up below, make sure the ID matches the sticker on the back of your detector. If you do not see the device, make sure the device is powered on and you are near it (same room).

When you tap the device, it will be bound to your account (and locked until you delete it). You will see a tile showing the following:
Online/Offline status and last ping time
Current Jamming Probability meter
Anything below 20.0 is considered normal, you may see this jump around from ~4.0 (green) to ~15.0 (orange) depending on how noisy the environment is.
Anything over 80.0 is a jamming event and you will get an immediate alert.
Between ~40-60 may be a jamming event and we will notify you depending on how long the interference lasts.
Note, you don't ever need to manually monitor this, we alert you automatically even when the app is completely closed.
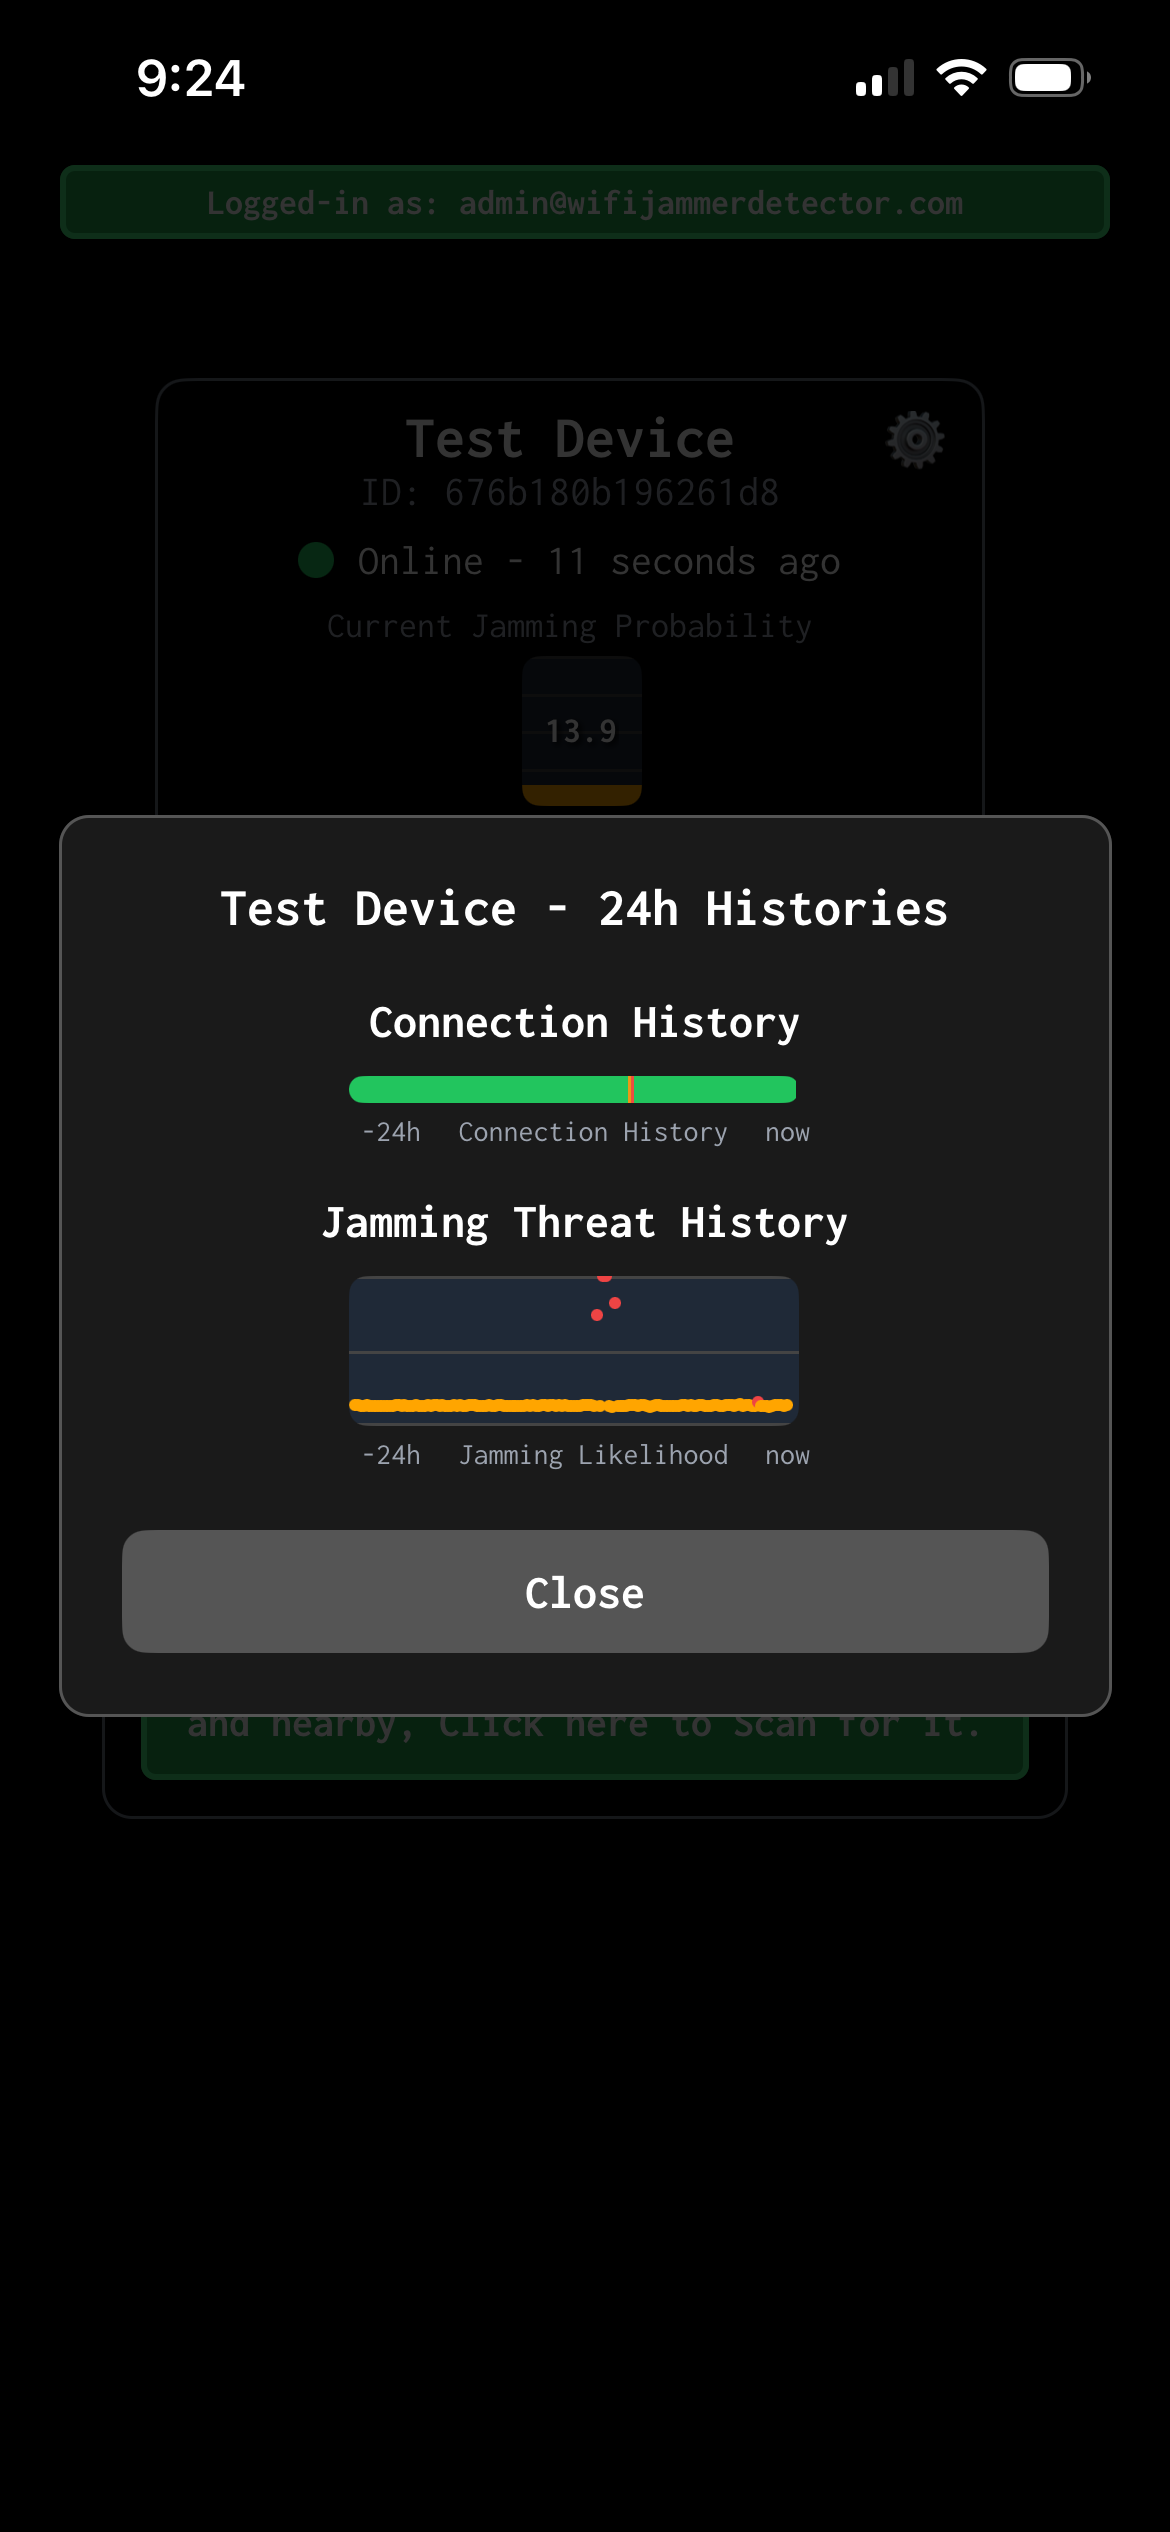
If you click on the tile, you can see 24-hour histories of the online/offline status and the jamming probabilities.
If you click the Gear icon, you can set the device name, share the device with other users, or delete the device from you account:

Naming the device will help you keep track of which device is which when you get alerts:
Finally, you can click on the device tile to load the 24-hour histories of online/offline status and the Jamming detections: